
 БГ
БГ FR
FR
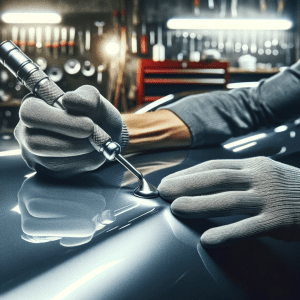
Have you ever wondered how professionals flawlessly restore the surface of cars after an impact without the need for repainting? This art is called Paintless Dent Repair (PDR), and it’s the preferred method for dent removal as it preserves the original paint and is much quicker and cost-effective than traditional repair methods. In this self-study guide, we will acquaint you with the fundamentals of PDR, so you can perform simple repairs at home.
PDR is a technique that requires patience and skill, but its basic principles can be learned by any enthusiast who wishes to care for their own vehicle. Whether your car has fallen victim to hail damage or just a little careless parking, PDR might be the solution you’re looking for.
Section I: Getting Ready for PDR
Necessary Tools and Materials
The first step towards a successful PDR project is preparation. You’ll need to gather some essential tools, including a PDR kit with a variety of dent removal tools in different shapes and sizes, an LED lamp for assessing the dents, and, of course, a good amount of patience and time. It’s worth noting that the quality of your tools can significantly affect the outcome of your work.
Setting Up Your Workspace
Select an appropriate workspace where you have plenty of room and excellent lighting. Proper lighting is crucial because you’ll need to closely observe the paint’s reflections to evaluate the depth and orientation of the dents. Keep your workspace clean and well-organized to prevent any potential damage to your vehicle or tools.
Evaluating the Dent
Before you dive in, it’s essential to assess the dent. Utilize the LED lamp to determine its size, shape, and depth. Some dents may appear small on the surface but have a more significant volume beneath. Additionally, it’s vital to check whether the paint has been damaged, as PDR is most effective when the original paint remains intact.
Section II: PDR Techniques
Paintless Dent Repair (PDR) without the need for repainting is a true art that demands attention to detail and practice. After preparing your workspace and assessing the dent, it’s time to proceed with the actual repair.
Step 1: Upholstery Method
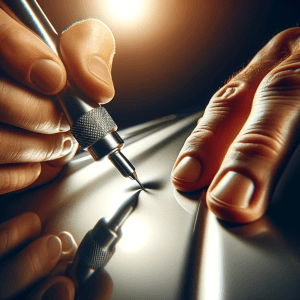 Begin with the most fundamental tool in the arsenal of PDR techniques – upholstery tools. These tools come in various shapes and sizes and are designed to reach the dent from behind the panel.
- Tool Selection: Choose a tool that best matches the shape and size of the dent.
- Positioning: Determine the most accessible point to reach the dent, which may require removing some parts of the car, such as door panels or bumpers.
- Pressure: Use the tool to apply slow and consistent pressure from behind, pushing the dent outwards. This should be done carefully to avoid creating new bulges.
Work slowly and methodically, being mindful not to over-pressure and create high spots.
Step 2: Vacuum or Suction Cup Usage
For flat and accessible areas, vacuum cups and suction tools can be effective for dent removal.
- Cleaning: Ensure the area around the dent is clean and dry.
- Attachment: Secure the suction cup at the center of the dent.
- Pulling: Slowly and steadily pull the suction cup outward while assessing the progress.
This method is often used for shallow dents and may require several attempts to achieve the desired result.
Step 3: Hot Water and Household Tools
Some dents, especially those in plastic bumpers, can be removed using hot water.
- Heating: Pour hot water onto the dent to soften the plastic.
- Shaping: While the area is still warm, attempt to reshape and push out the dent from behind.
- Cooling: Use cold water or ice to “set” the plastic back to its original form.
This technique requires speed and precision, as the plastic will quickly return to its original shape upon cooling.
Finishing and Polishing
After successfully straightening the dent to a point where it’s nearly or completely invisible, the subsequent steps are critical to restoring the flawless appearance of your car’s surface.
- Inspection: Once again, use your LED lamp to illuminate the treated area and check for any remaining minor imperfections.
- Polishing: If there are any remaining micro-dents or protrusions, you can employ a fine polishing technique using a soft upholstery tool.
- Cleaning: After polishing, clean the area with an appropriate automotive shampoo and a microfiber cloth to remove any residues and dust.
Performing these final steps ensures that your vehicle will look as good as new while preserving the original paint and protective coating.
Conclusion
The practice of PDR is both an art and a science. It requires attention to detail, patience, and practice. With the right tools and techniques, you can achieve professional-grade results in the comfort of your own garage. We encourage you to give it a try, experiment, and not be discouraged if you don’t succeed initially. The time and effort you invest will save you significant costs from professional repairs and enhance your satisfaction in maintaining your vehicle.